


How to Manually Install and Configure a Magento Theme in 9 Easy Steps
Getting Started With Your First Magento Store
The time has come: you’ve decided to take the plunge and open up your very own online store.
You’ve combed through all of the ecommerce solutions out there: Shopify, Zen Cart, Big Commerce... and your research is telling you that Magento is the top choice. It’s an excellent choice, and not just because Magento is the top ecommerce solution on the market. Magento is what’s known as an “open source” platform, which gives developers the ability to customize and extend its functionality to their heart’s content. What’s more, because Magento is so popular there is GREAT support in the greater community that you can access through the forum or Stack Overflow. Overall, Magento is a powerful tool that makes ecommerce sense.
If you have some tech savvy, you should be able to install and configure a Magento theme and get ready to start selling some products.
This article will walk you through the necessary steps to install and configure a Magento theme.
STEP 1
Figure out your hosting requirements. Using Go Daddy for your basic shared hosting may not be the way to go, depending on your unique needs. Instead, I would start with a Magento Hosting Partners like Nexcess or Rackspace. These industry partners are optimized for Magento and also offer affordable basic plans. Selecting a partner that is Magento optimized will give your store the speed your user requires.
STEP 2
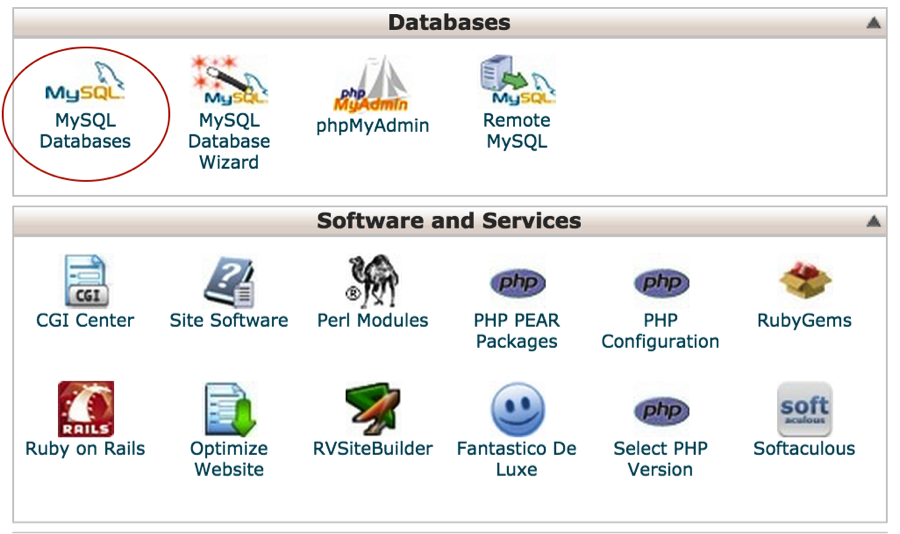
Once hosting has been set up, you will want to login to your cPanel and create a database for your Magento Store to connect to. You will also want to create a database username and password record for this, as you will ultimately need them when you install Magento on your hosting server.
STEP 3
Now, you can go ahead and actually download your Magento Community Edition software here. Once you have downloaded your package and unzipped it, upload the application up to the root of your domain’s web-hosting directory. Contact your hosting provider if you are unfamiliar with their FTP services.

STEP 4
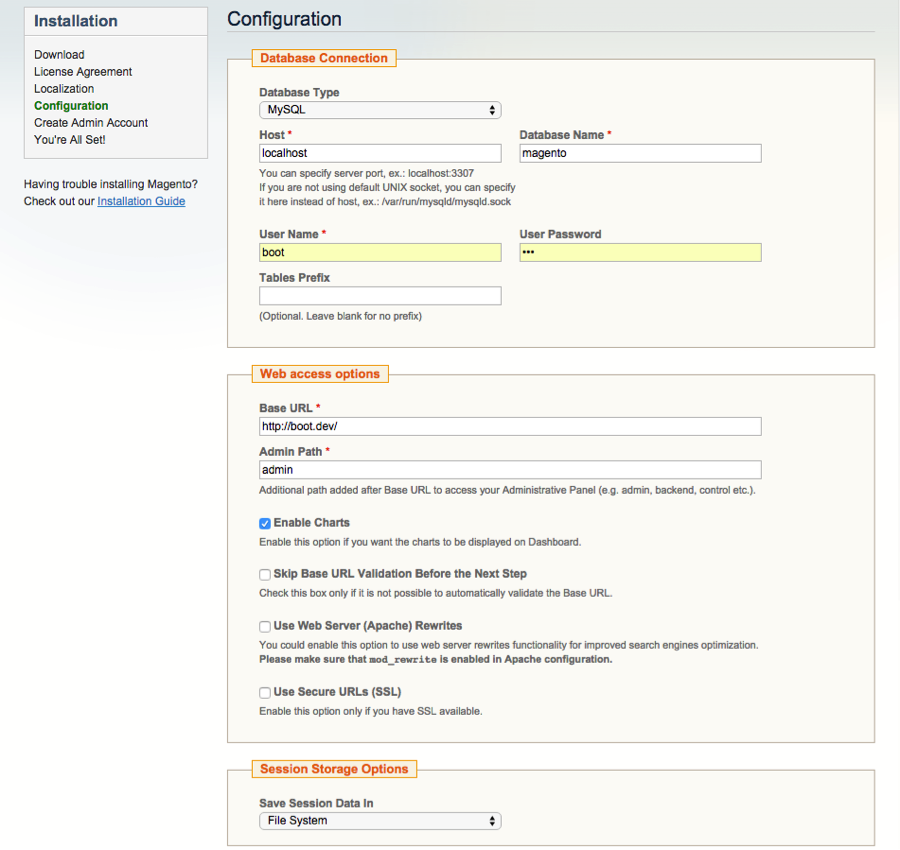
Assuming everything has been done correctly, at this point, you will be able to navigate to your store’s URL in a browser: www.yoursite.com. From there, Magento will walk you through the installation phase. This is where you will enter the username and password that you recorded when you created your database. From there, you will create a new username and password to log into the site. Congrats! You’re up and installed, and ready to start configuring your new store.
STEP 5
Find yourself a theme to use for your online store. Themeforest or Magento Connect are both good resources. You also have the option to go with the RWD theme that ships with Magento. Make sure you choose a responsive theme that is mobile friendly.
STEP 6
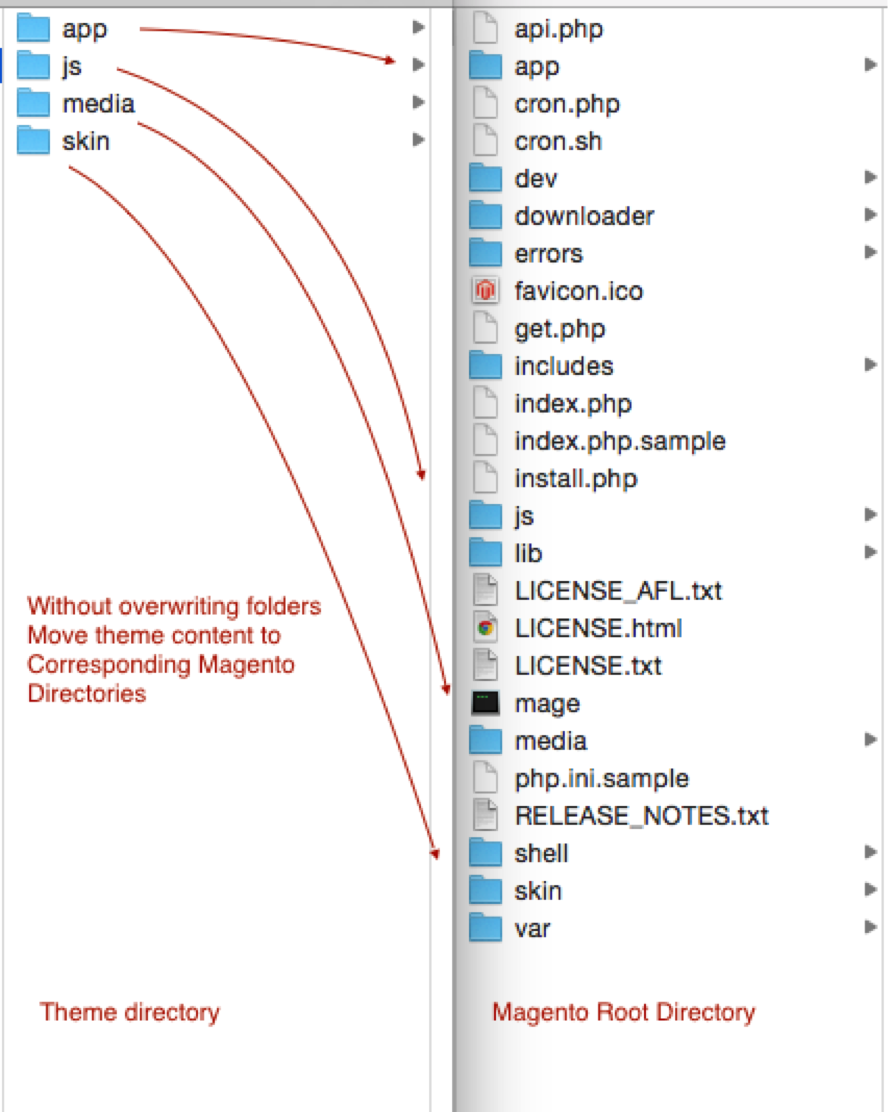
Install your theme. After your theme has downloaded, you will see that you have a few folders that compose your theme. Every theme will at least have the app and the skin folders. These are the necessary folders for a custom theme. Move the content of these folders over to the corresponding Magento directories. You can install your theme before you FTP your Magento Application to your hosting server, or FTP up the theme after Magento has been installed.
Step 7
Set your theme. Your theme package and theme name are determined by the name of the theme directories in
• app > design > frontend > package name > theme name
• skin > frontend > package name > theme name.
You can rename them there, but they both need to correspond.

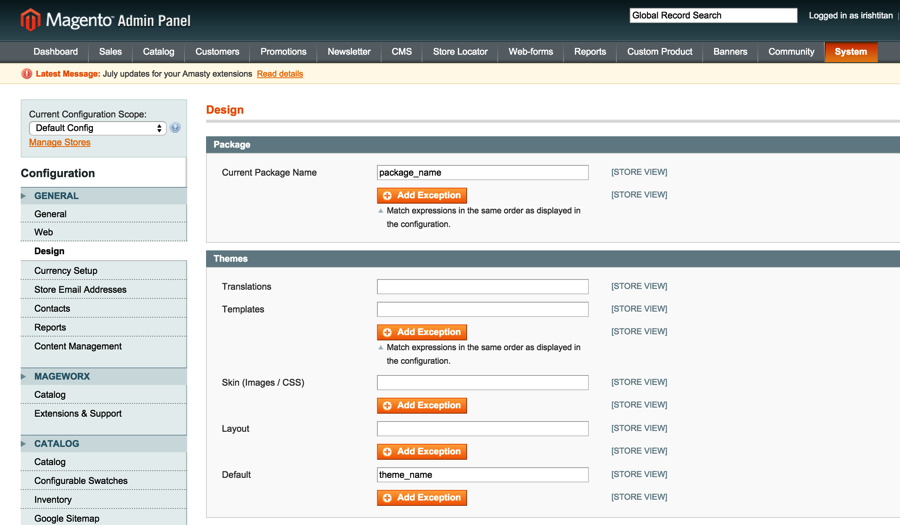
Once you have determined your theme name, you can set the theme in the Magento Admin. This can be done under system > configuration > general > design. You will also want to set the package name of your theme package. Then, set the theme name under the default field under theme. Now your theme should be visible in the frontend.
Step 8
Upload your logo and configure it in the admin. You will need to FTP your logo up to skin > package name > theme name > images folder. After you have uploaded your logo, you can set the path to it in the admin under system > configuration > general > design > header. The path should be images/logo.png.
Step 9
Configure other settings in the design tab. You will also want to update your copyright in the footer tab. Upload your favicon in the head tab. Upload your logo to the transactional emails tab. That will set you up with most of the important elements in the design tab. If you are not seeing your changes go through after a refresh you will need to clear your Magento Cache. This can be found in the admin under system > cache management.
At this point, your theme is now up and running. Now it’s time to go make some products and start selling!


Trust us, you’re gonna want this in your inbox.
Join the Irish Titan sphere of influence. We'll send a couple emails a month. No trash, no spam, just the shenanigans we get up to.


More from Ecommerce...


Whether you're managing a small shop or running a large-scale operation, shipping plays a crucial role in your business’s success. But with multiple carriers, complex rate structures, and diverse customer expectations, it can be challenging to provide a shipping process that is both efficient for your business and satisfying for your customers.

In today’s fast-paced digital world, inclusivity isn’t just a trend—it’s a necessity. For ecommerce businesses, ensuring website accessibility is vital not only for regulatory compliance but also for delivering a seamless experience to all users, including those with disabilities. Accessible websites help expand your audience, enhance brand reputation, and boost conversions

As we continue to dive into the new year, it’s the perfect time to focus on building a strong ecommerce foundation to position your business for long-term success. At Irish Titan, we know scaling an ecommerce business comes with unique challenges—and we’re here to guide you through them with confidence.
